Provisioning (SCIM)
Enterprise
With provisioning, your identity provider adds people here, updates them and suspends those who leave as soon as it happens there, without waiting for them to sign in. Each of its groups becomes a group here, with the same members. It works with Entra ID, Okta and other providers that speak SCIM 2.0, for OpenID Connect and SAML providers, and needs Fadenstack Enterprise.
Before you start
- You are signed in to the console as a Superuser.
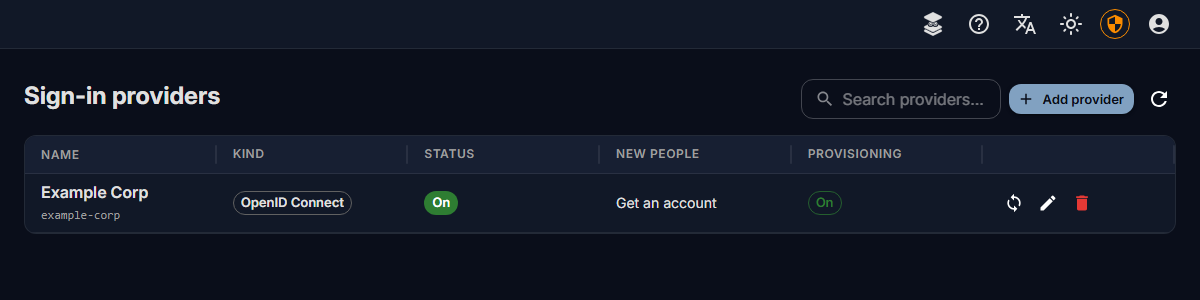
- The provider is set up under Access Control → Sign-in providers (see Sign-in providers).
- The server is reached over HTTPS, with a certificate the identity provider trusts. Fadenstack takes provisioning only over HTTPS.
- The identity provider can reach the server. Entra ID and Okta send from their cloud services: from the internet, or through the provider's agent inside your network (Entra ID: the provisioning agent with the On-premises SCIM app).
Switch provisioning on
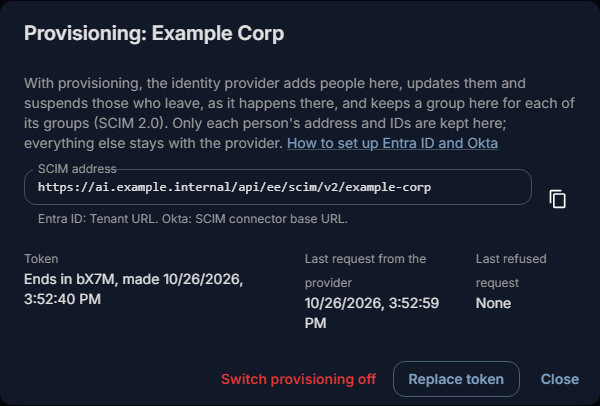
- Open Access Control → Sign-in providers and select the Provisioning icon (two arrows) in the provider's row.
- Select Switch provisioning on.
- Copy the SCIM address and the Token. The token is shown only now; later the dialog shows only its last four characters.
- Enter both at the identity provider (below) and start provisioning there.
The dialog then shows the Last request from the provider and the Last refused request. The Provisioning column of the providers list says On for the provider.
What Fadenstack keeps of the people it is sent
Only what it needs. Everything else stays with the identity provider, and is accepted and dropped here: never stored, never written to a log.
| The provider sends | Kept here |
|---|---|
The person's ID at the provider (externalId) |
Yes, to find the person again. Not shown. |
The login name (userName) |
Yes |
| One e-mail address (the work or primary one) | Yes: the account's address |
Active or not (active) |
Yes: the account is suspended or not |
| A group's name and members | Yes: a group here and its members |
The cost centre and the department (costCenter, department of the enterprise extension) |
Yes, for budgets: a rule can make a cost centre's team the person's usage group. Seen by administrators; erased with the account |
| Names, phone numbers, postal addresses, job title, manager, employee number, photos, other attributes | No |
Map only the attributes in the first six rows at the provider (below), and delete the other mappings. Map the cost centre and the department only if you use budgets.
What changes here
| At the identity provider | Here |
|---|---|
| A person is assigned to the application | They get an account with the provider's Roles of new accounts (see Sign-in providers). If an account with their address exists, it is linked, unless it is a superuser's or another sign-in provider keeps it. |
| A person's address or login name changes | The account's address changes. |
| A person is unassigned, disabled or deleted | The account is suspended: no sign-in, and none of their agents active. Nothing is deleted. |
| The same person is assigned again | The same account is let back in. |
| A group is assigned | A group with its name, Kept by the provider on Access Control → Groups. Give it roles and agents there. |
| A group's members change | Its members change. Members an administrator added stay. |
| A group is unassigned or deleted | The group stays, with the members an administrator added; it is no longer kept by the provider. |
Superusers are never changed or suspended by provisioning. A suspension made by an administrator, or after days without sign-in, is not lifted by the provider: Let back in on Access Control → Users does that.
The first sign-in
People provisioning added sign in with the provider as anyone else does. At their first sign-in, their account is linked to the sign-in without the proof asked of other people who already have an account here:
- by the ID the provider sends at sign-in, when it is the one provisioning sent (Entra ID: set
Claim that names the person to
oid, see OpenID Connect); - else by their e-mail address, when the provider vouches for it.
From then on provisioning keeps their address and groups: the sign-in changes neither, and the provider's group rules do not apply to them. To let only these people sign in with the provider, tick Only people the provider's provisioning added may sign in with it in the provider's settings.
Entra ID
An application you registered under App registrations for OpenID Connect cannot provision. Add a second application for provisioning, and assign it the same people and groups.
Each person needs an e-mail address in Entra ID: their Email under Properties → Contact information. People without a mailbox have none until it is set, and Fadenstack takes nobody without an address.
- In the Microsoft Entra admin center, open Entra ID → Enterprise apps → New application → Create your own application, name it, choose Integrate any other application you don't find in the gallery (Non-gallery) and select Create. (For a SAML provider you can use the application people sign in with.)
- Open its Provisioning page and select New configuration (or Get started, and set Provisioning Mode to Automatic).
- Choose bearer authentication, paste the SCIM address into Tenant URL and the Token into Secret Token, and select Test Connection. Then save.
- Under Mappings, open Provision Microsoft Entra ID Users. Keep
userName,active,emails[type eq "work"].valueandexternalId; delete the other mappings. Set the source ofexternalIdtoobjectId, the person's ID in Entra ID. - Under Provision Microsoft Entra ID Groups, keep
displayName,membersandexternalId. - Under Settings, choose Sync only assigned users and groups. Assign people and groups on the application's Users and groups page.
- Back on Provisioning, set Provisioning Status to On and save.
Entra ID sends changes in cycles, about every 40 minutes. To try one person at once, use Provision on demand. Entra ID's Provisioning logs show what it sent and what this server answered.
Okta
- In the Okta Admin Console, open the application people sign in with (Applications → Applications).
- On General, under App Settings, select Edit, choose SCIM under Provisioning, and save. A Provisioning tab appears.
- On Provisioning → Integration, select Edit:
- SCIM connector base URL: the SCIM address.
- Unique identifier field for users:
userName. - Supported provisioning actions: Push New Users, Push Profile Updates and Push Groups.
- Authentication Mode: HTTP Header, and the Token as the bearer token, without
Bearerin front of it.
- Select Test Connector Configuration, then save.
- On Provisioning → To App, select Edit, switch on Create Users, Update User Attributes and Deactivate Users, and save.
- Under the attribute mappings, remove what Fadenstack does not keep, where Okta lets you. What it still sends is dropped here.
- Assign people and groups on Assignments; push groups on Push Groups.
For sign-ins with SAML, have Okta send its ID for each person as subject-id (see
SAML): a person's first sign-in then finds the account provisioning made by that ID.
Replace the token or switch off
- Replace token: makes a new token at once. The old one stops working, so the provider's changes are refused until you enter the new one there.
- Switch provisioning off: the token stops working. The people and groups provisioning made stay as they are, and people keep signing in with the provider.
- Deleting the provider under Sign-in providers ends its provisioning too.
When it does not work
| You see | What to do |
|---|---|
| The provider's test fails with 401 or "unauthorized" | The token is wrong or was replaced. Select Replace token and enter the new one at the provider. |
| The provider's test fails with 403, "Provisioning answers only over HTTPS." | The provider used http://. Use the SCIM address as the dialog shows it, opened over HTTPS. |
The provider's test fails with 403, "Provisioning needs an active Fadenstack Enterprise licence.", or Last refused request shows 403 licence |
The licence is missing or has expired; the admin pages say which. Accounts keep their last state meanwhile. |
| The provider cannot connect at all | It cannot reach the server, or does not trust its certificate. See Before you start. |
| Okta's test says no users were returned | Nobody is provisioned yet. Save, then assign people. |
| A group pushed from Okta does not appear under Groups | Okta could not reach the server when it pushed. On Push Groups, select the group's Push Status → Push Now, or Retry under Dashboard → Tasks. |
Last refused request shows 409 UniquenessException |
Two people at the provider have the same login name or address, or another sign-in provider keeps the account with this address. Fix it at the provider. |
Last refused request shows 403 ForbiddenException |
The address is a superuser's here, and superusers are never provisioned. Leave that person unassigned at the provider. |
Last refused request shows 400 InvalidFilterException |
The provider asked in a way this server does not answer. Map userName as the unique identifier. |
| Last refused request shows 429 | The provider sent too much at once; it tries again by itself. |